So I sat down a couple of hours ago, thinking AWS Lambda could be the perfect service for something simple I needed to do:
Outputing some html dynamically based on a few incoming parameters, it's basically "Hello, x".
Which is exactly what I will boil down this example to, because it turns out there was a lot of hoops to jump through to make this work.
Lambda functions
Let's start with the javascript part:
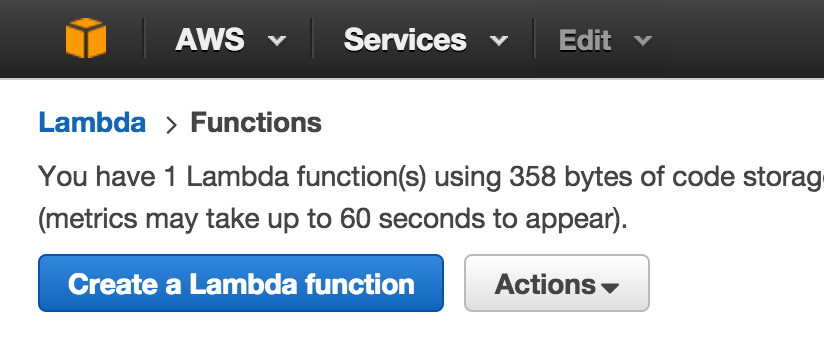
Select Lambda in the AWS console and click "Create a Lambda function"
Amazon provides you with some "blueprints", which are little example functions that can get you started. You might want to browse these later to see what they all do, but for now hit "Skip" at the bottom.
Enter name and description. Pick any name you want, "helloX" or whatever describes what you want to do.
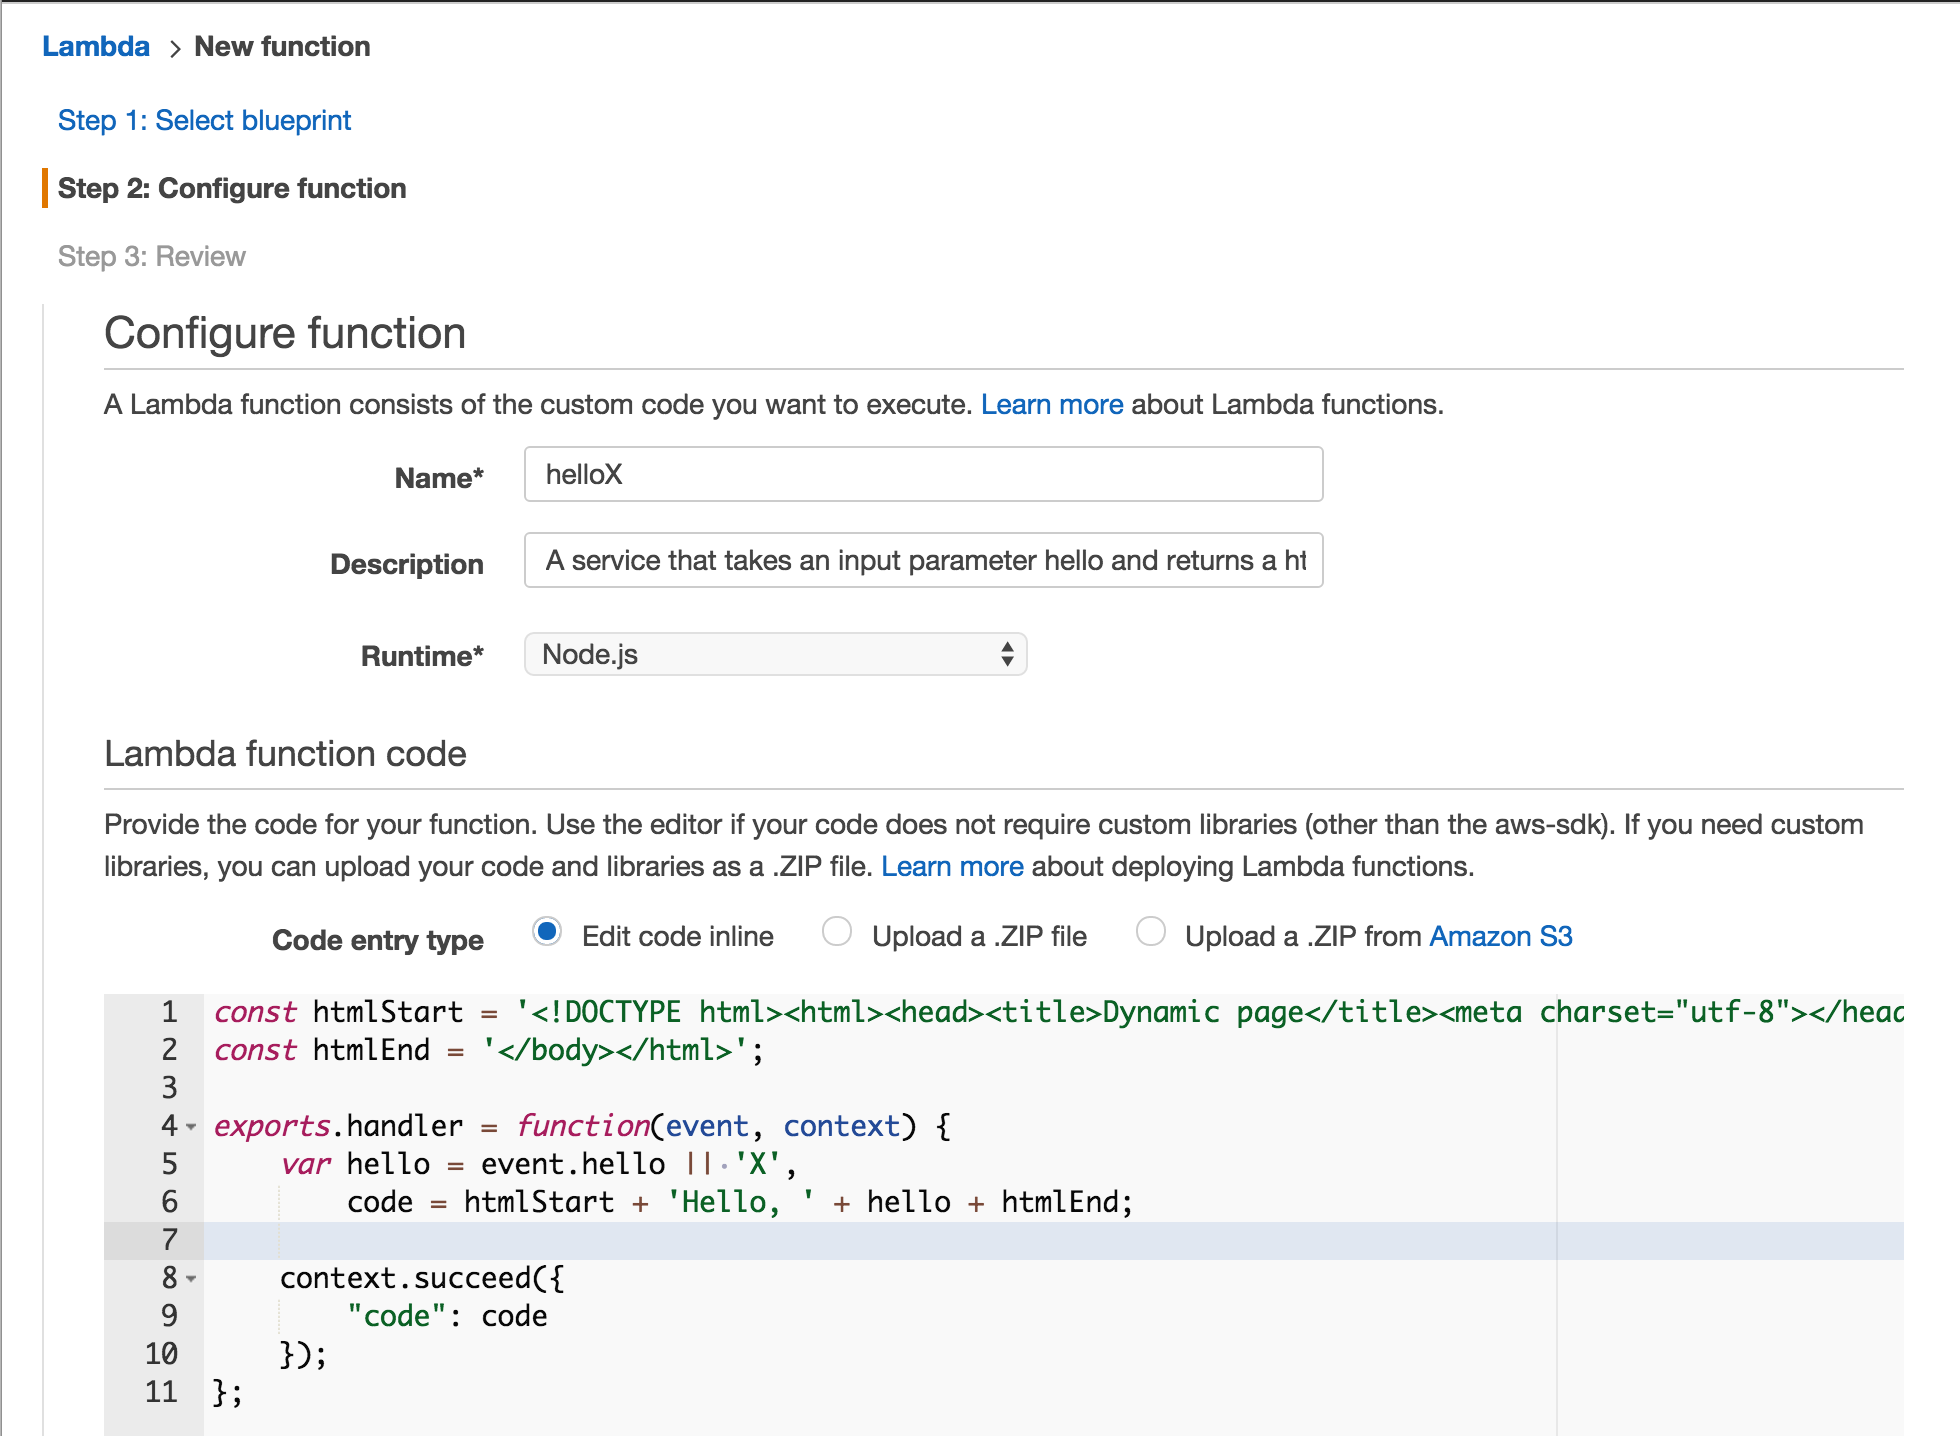
- Next we'll enter some code:
const htmlStart = '<!DOCTYPE html><html><head><title>Dynamic page</title><meta charset="utf-8"></head><body>';
const htmlEnd = '</body></html>';

exports.handler = function(event, context) {
    var hello = event.hello || 'X',
        code = htmlStart + 'Hello, ' + hello + htmlEnd;

    context.succeed({
        "code": code
    });
};
Should be easy to keep up with this code, a lamdba handler function expects an event object as first arg (which holds the payload from an event) and a context object as a second arg, which holds runtime and request info.
The code expect an incoming "hello" property on the event object, wraps it in some html, and calls the context's succeed method to finish (we could also call .fail() here).
The only other interesting part is the name of the export, "handler" which should match what's the handler name we put in the next box.
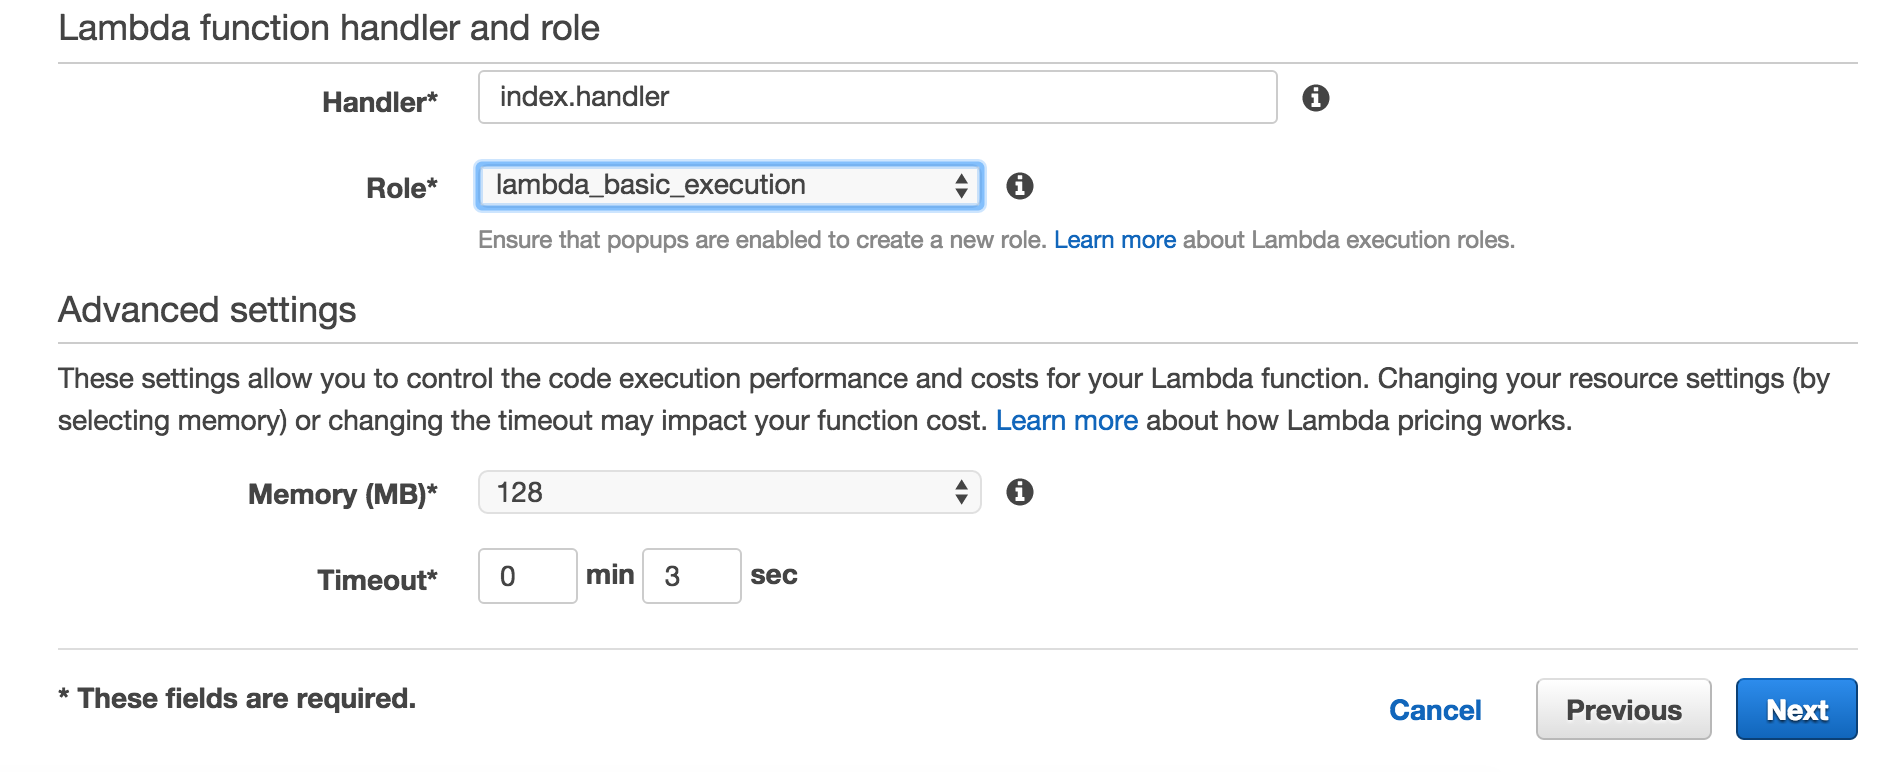
Since we named the export handler we can just leave this.
For Role select "Basic execution role" under "Create new role" in the drop down. This will take you to a new page where you can just select the defaults for creating a new role and clicking "Allow".
That's the setup for the Lambda function, you can now click "Next", and "Create" after you review your function info.
Congrats! You have a Lambda function! You can even test it by clicking the blue "Test" button above the code. The first time you do you get to configure the input for the test, for example:
{
  "hello": "Lambda"
}
Running the test now you can see that the function outputs what you would expect.
API Endpoints
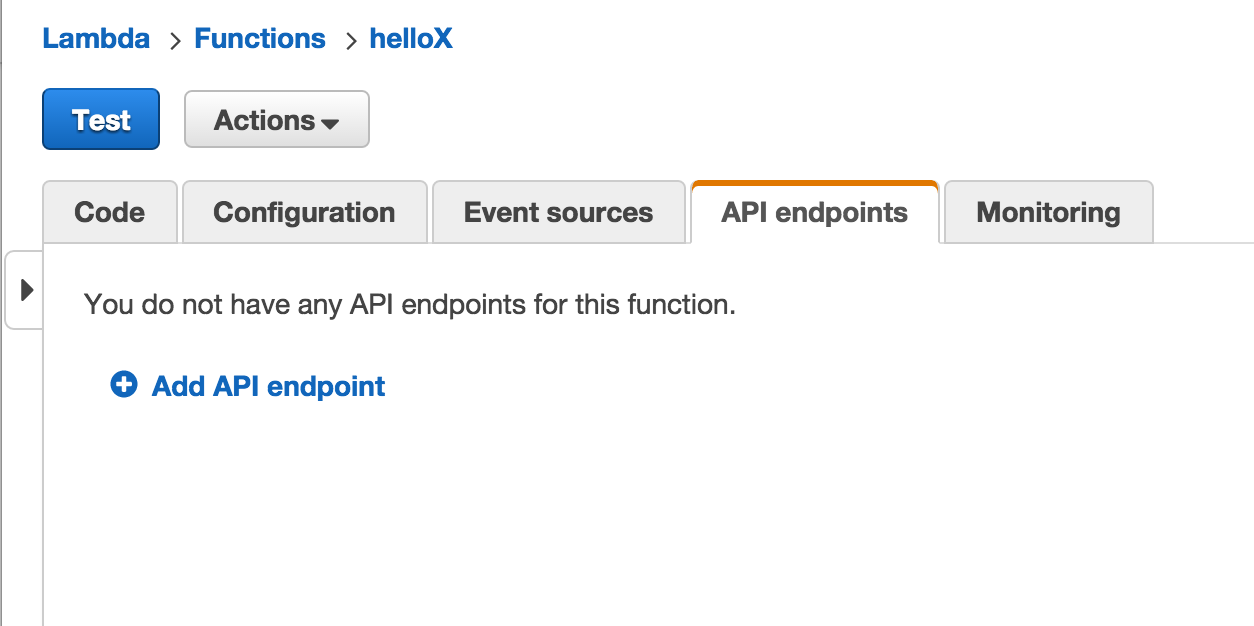
We do not yet have an endpoint setup, so let's remedy that!
Click "Add API endpoint and add something like this:
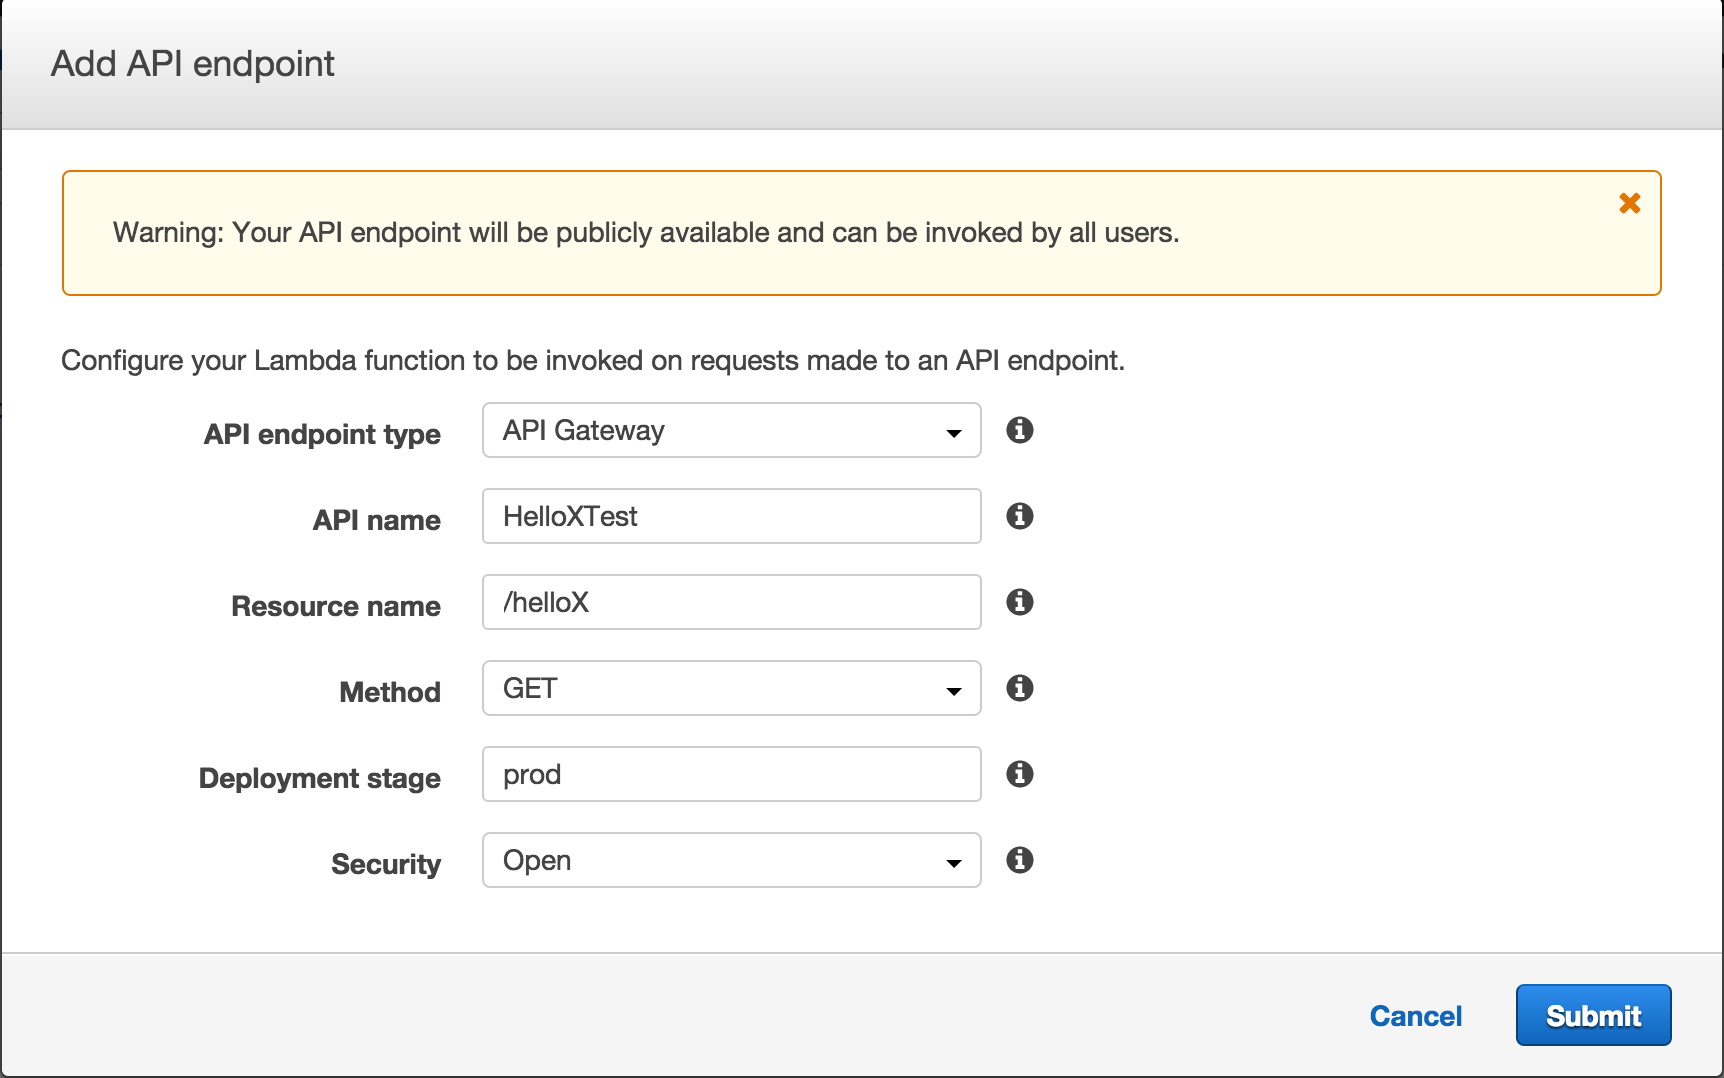
Notice I am creating a public URL by selecting "Open" under security.
This will give you a URL like: https://...x.execute-api.us-east-1.amazonaws.com/prod/helloX where you can access your lambda function.
This is the part where I thought I was almost done, but the rest took some figuring out unfortunately.
Input mapping
We have a URL, but no way to get any input variables to our lambda function yet, visiting our URL gives us back json with a default "Hello, X" message.
This new endpoint is using another AWS service, the "API Gateway". We'll do the rest of the configuration there. Open up a new tab and open your AWS console for API Gateway, https://console.aws.amazon.com/apigateway/home.
You should see something like this:
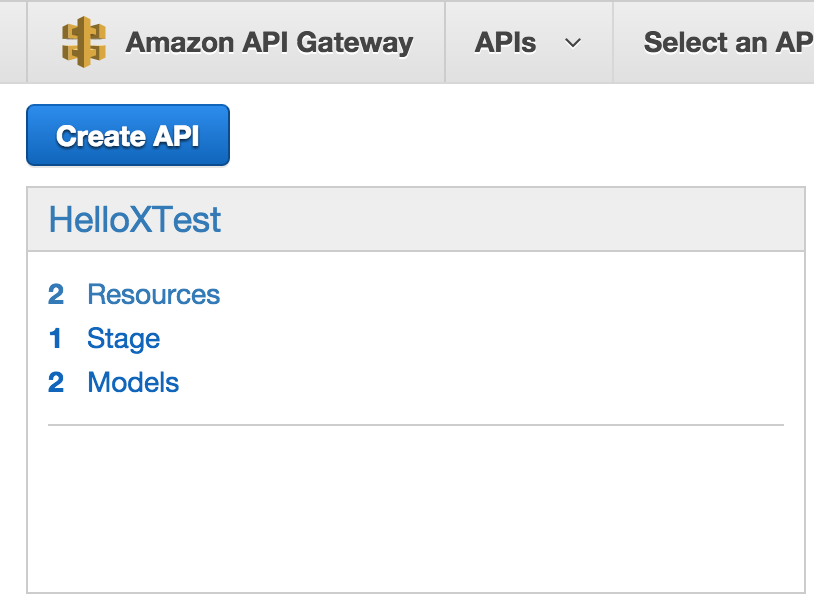
Click "Resources" and then on "GET" on the left hand side:
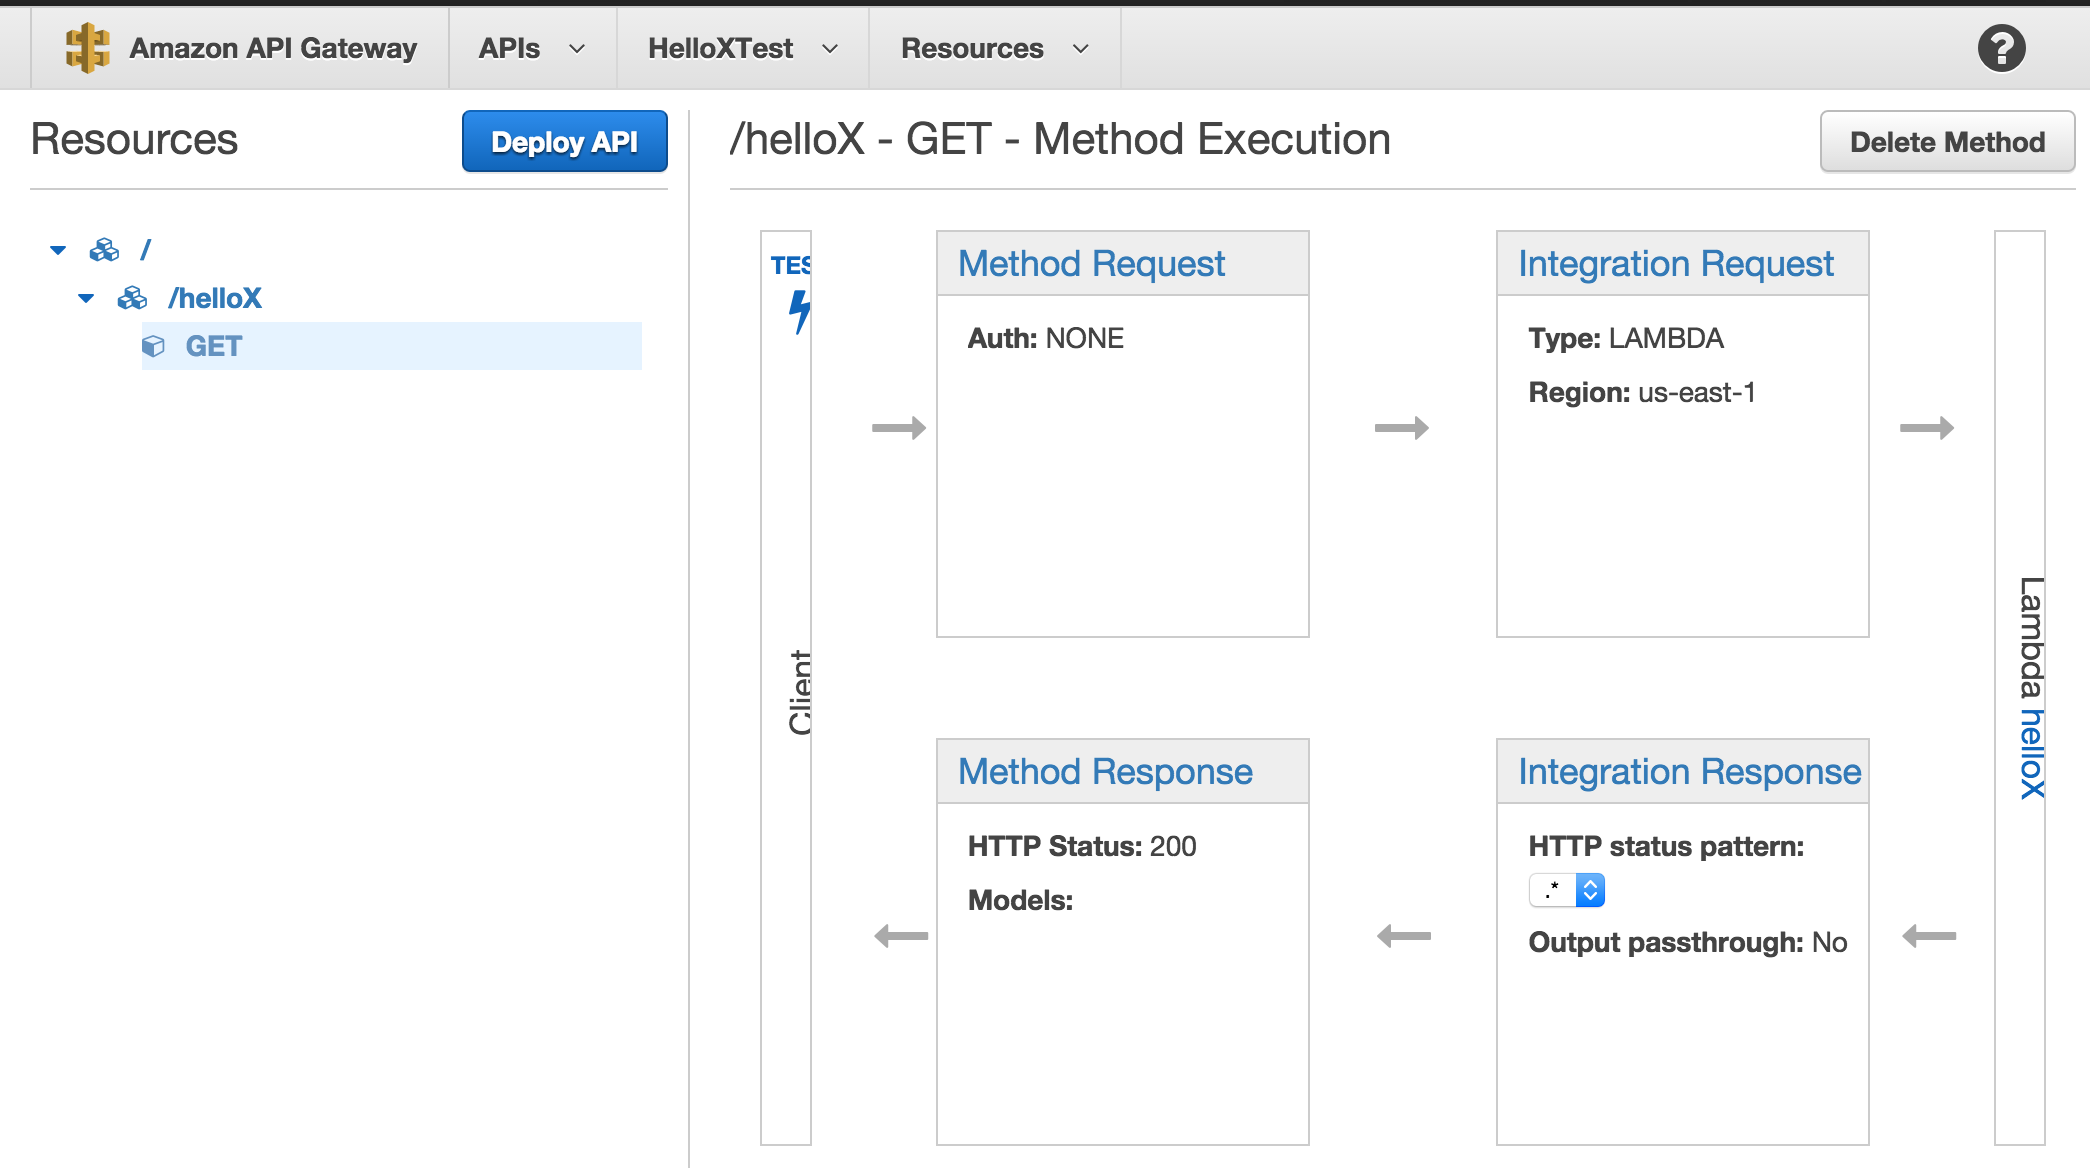
"Integration request" is where we can finally get our hands on some input variables, click that.
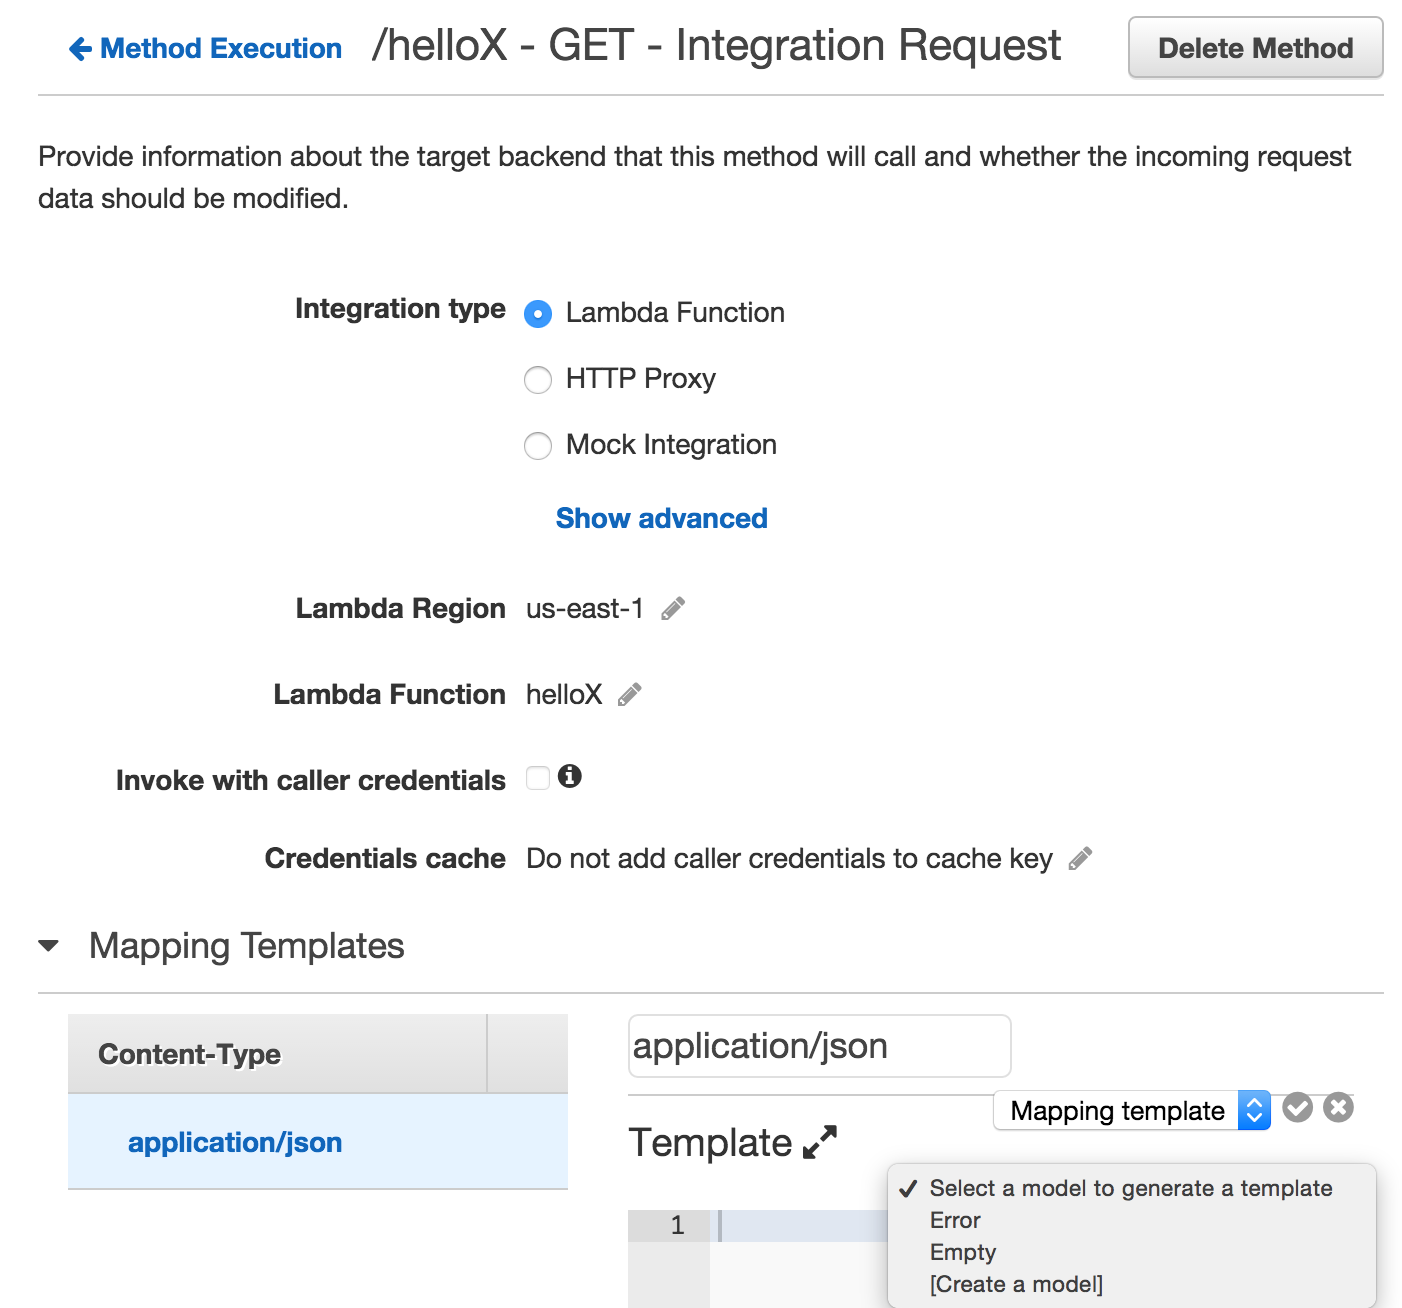
This part can get a little frustrating but bear with me. First type in "application/json" under Content-Type on the left and click the little check mark.
Next click the edit button next to where it says "Input passthrough", pick "Mapping template" in the dropdown.
In the next dropdown select "[Create a model]", you would think that you could select Empty, edit the code a bit and save, maybe that's supposed to work, but whatever I typed there never persisted for me whatever I tried.
Anyway... A model is a json schema so we can add something like this:
{
    "title": "Hello Schema",
    "type": "object",
    "properties": {
        "hello": {
            "type": "string"
        }
    },
    "required": ["hello"]
}
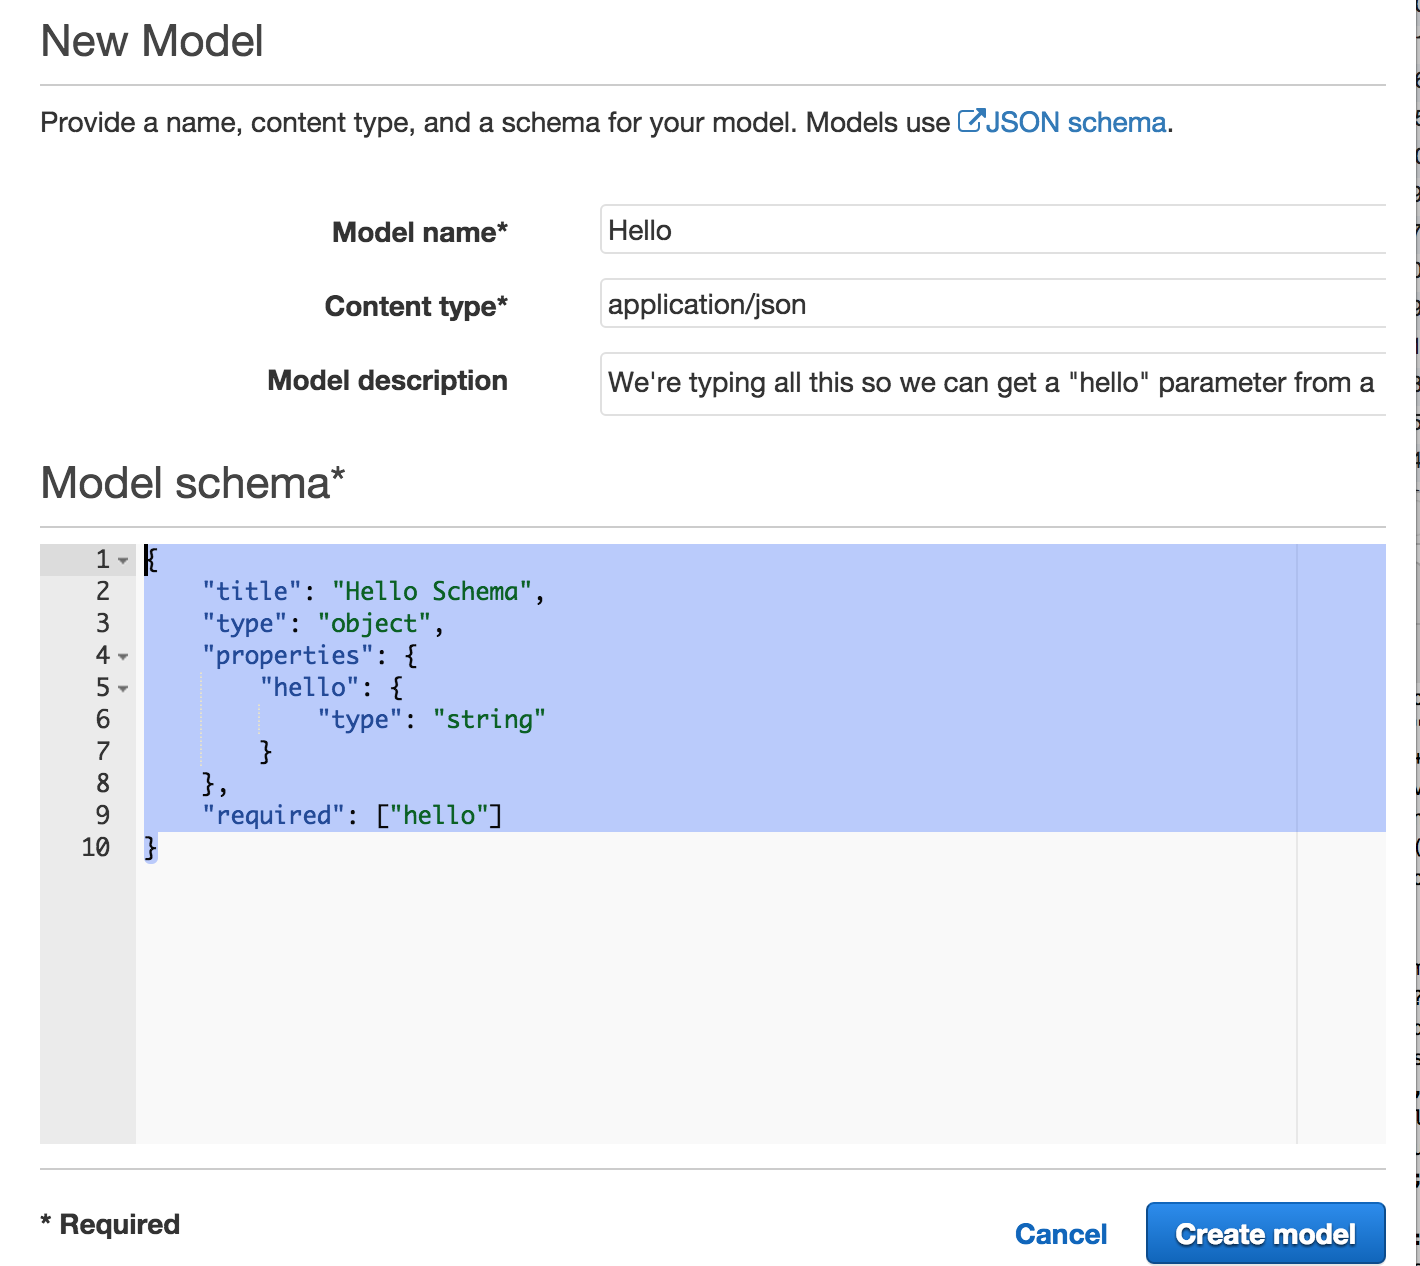
Click "Create model" and you'll be taken back to the previous page.
This time you can select your new "Hello" model. and tweak the code a little bit so it looks like this:
#set($inputRoot = $input.path('$'))
{
  "hello" : "$input.params('hello')"
}
This should take care of input parameter mapping, if you want you can now deploy your API and see that the "hello" parameter is included in the response.
https://...x.execute-api.us-east-1.amazonaws.com/prod/helloX?hello=Lambda
The output is still JSON though, which is the last thing I wanted to take care of.
Output mapping
Let's go back to this page (Click the blue breadcrumb that says "method execution" at the top of the page)
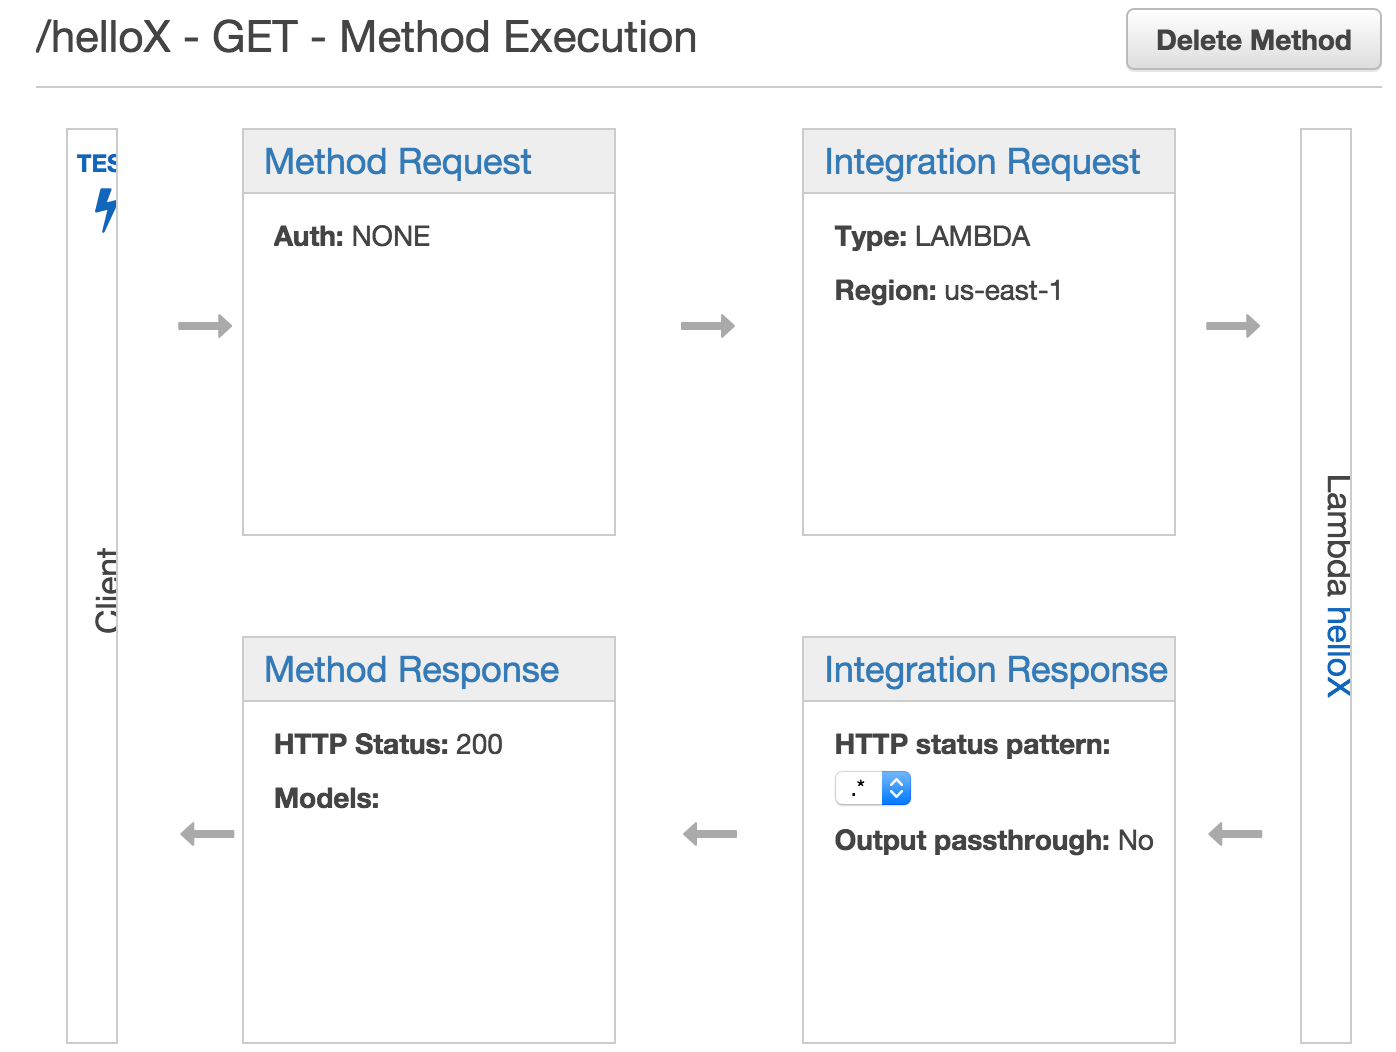
We're going to make a quick change to "Method Response" and then do most of the work in "Integration Response", so click "Method Response" first.
Click the little arrow next to "200" and add a Content-type header, the value we will add on the "Integration Response" page.
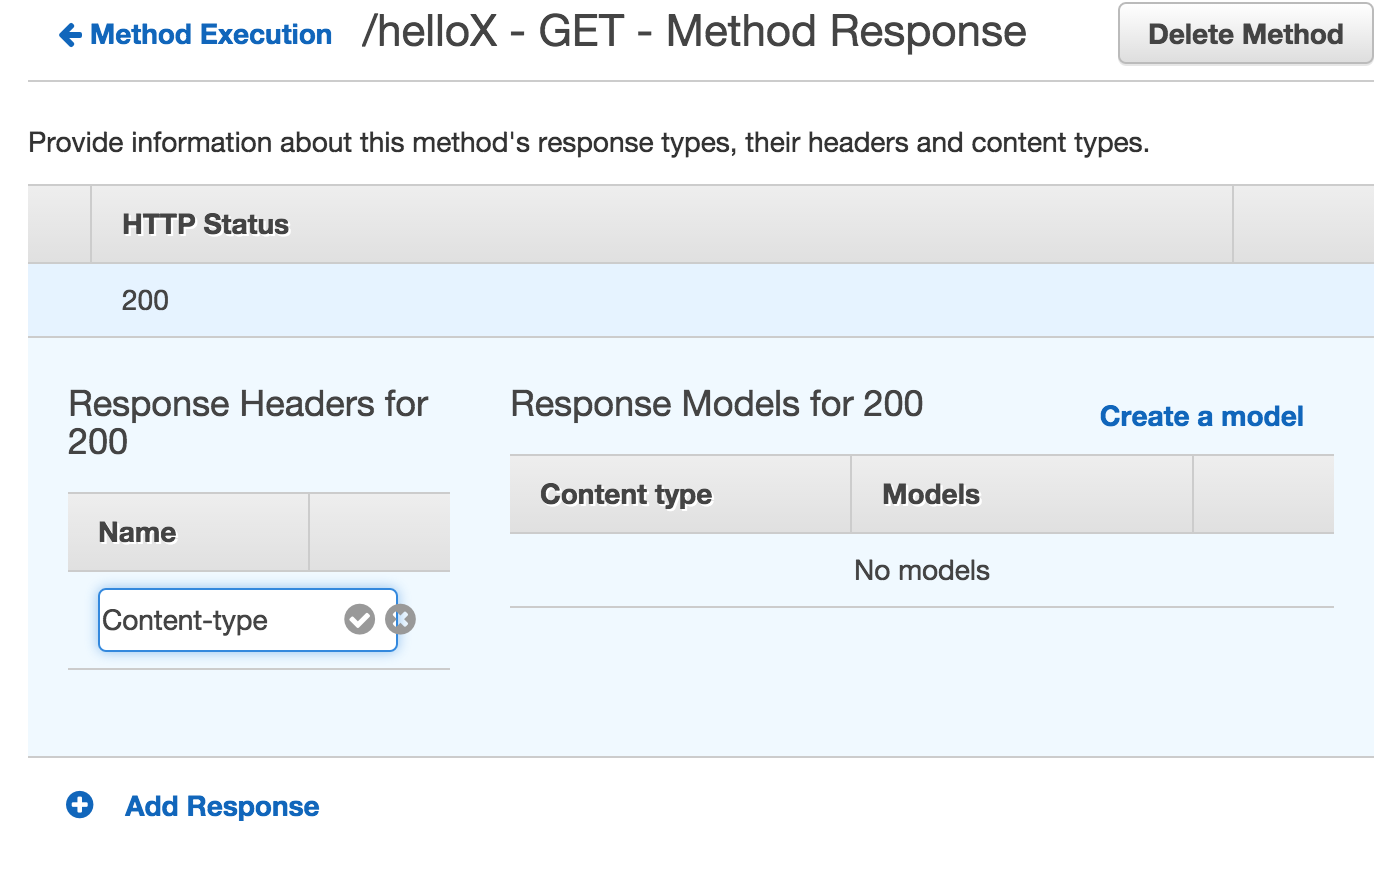
The last part of the puzzle is the "Integration Response" page.
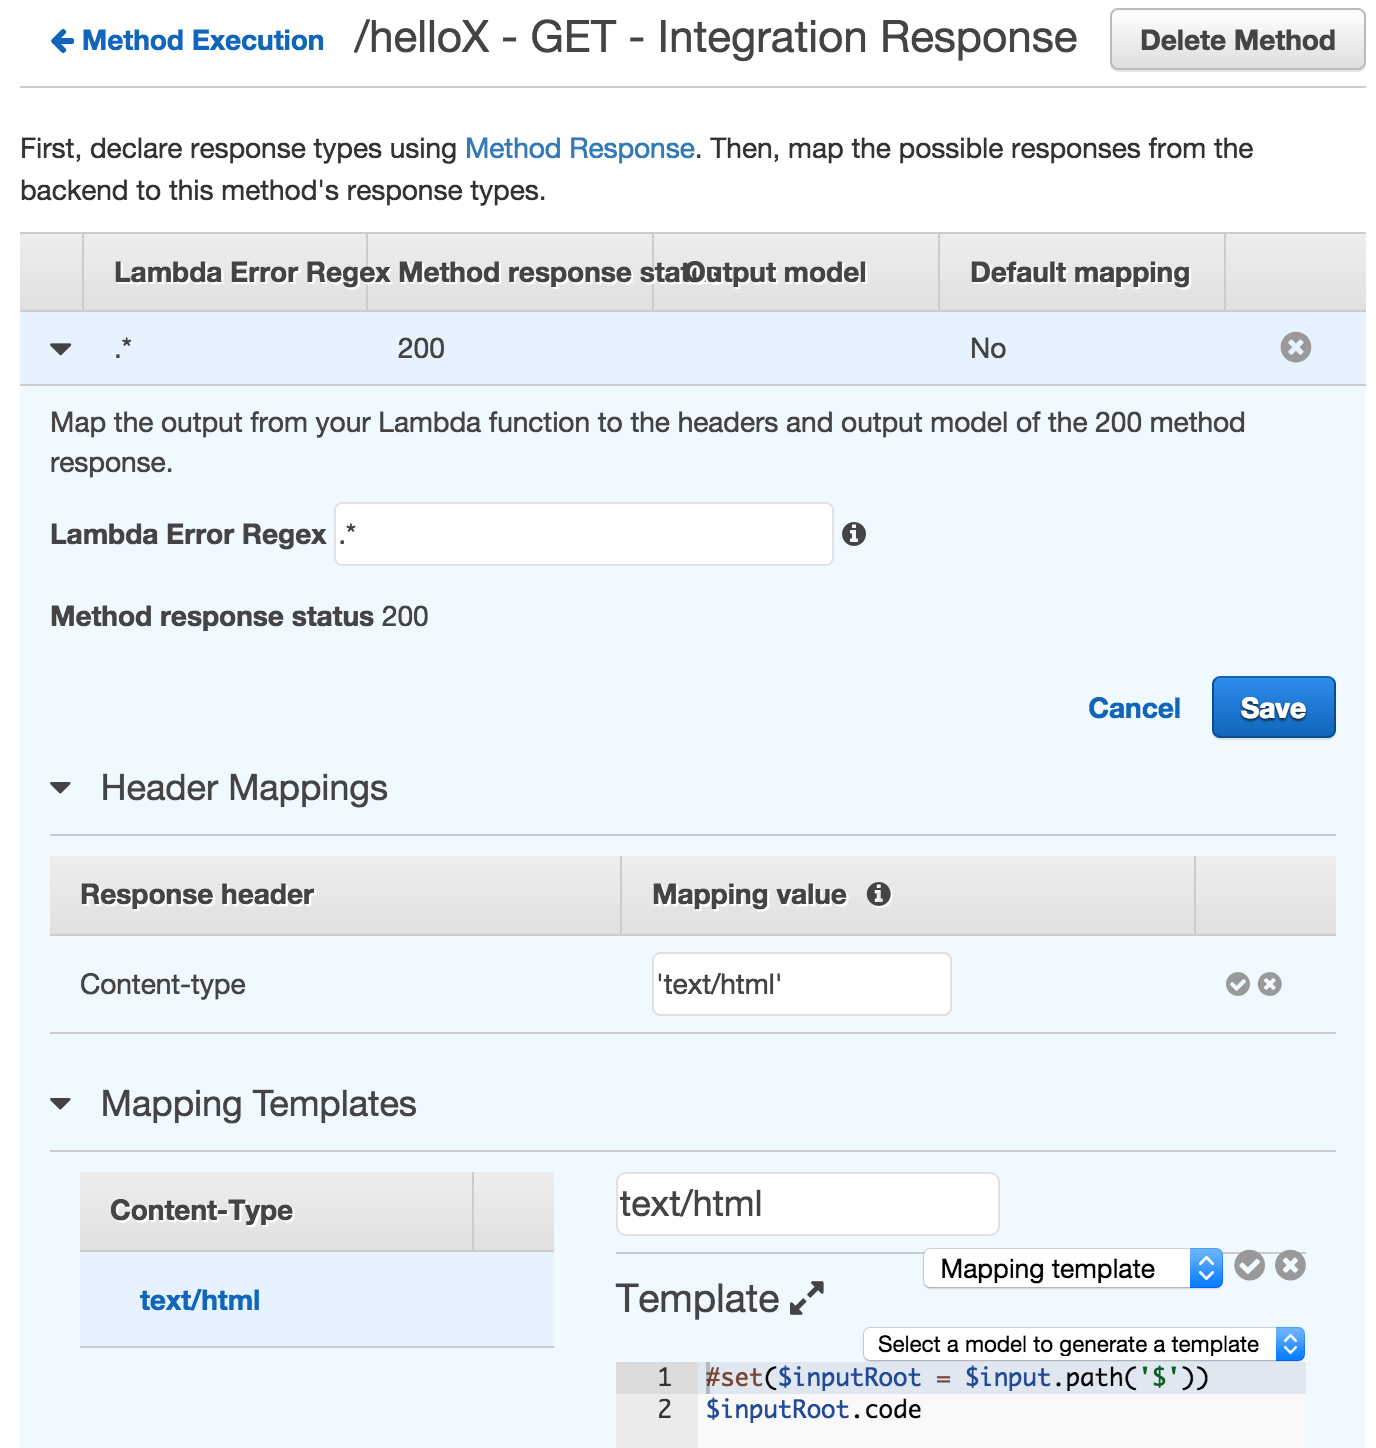
Under "Header Mappings" add 'text/html' as value, the single quotes are important. Save it by clicking the check mark next to the text box.
Under "Mapping Templates" add a text/html content type, and the following code as the mapping template (here it is perfectly OK to select the "Empty" model and modifying it).
#set($inputRoot = $input.path('$'))
$inputRoot.code
We are just echoing out the code property we are returning from our lambda function here. Which with the proper Content-type headers should be all we need.
Once you've saved this you can hit the blue "Deploy API" button near the top, picking "prod" as environment and you should be good to go.
Your Lambda function is now a fully working "Hello, X" example, taking url params and delivering html. What else could you need in life? ;)